 This article provides a guide for how to install and run open source Feedback Portal to gather feature requests and custom suggestions.
This guide will demonstrate the step-by-step process to deploy your very own self-hosted platform to collect user feedback such as feature requests and customer suggestions.
Overview
We will be deploying a self-hosted open source platform called Fider in this guide. Fider is a feedback portal for feature requests and suggestions.
Prerequisites
This guide requires the following prerequisites:
- A VPS server with root-level access
- Fresh install of Ubuntu 20.04 LTS or Ubuntu 22.04 LTS (Recommended)
- An understanding of using the command-line
Install and Run Open Source Feedback Portal (Self-hosted)
Follow the steps below to install Fider dependencies on your Ubuntu VPS server:
How to Install Docker, Docker Compose, PostgreSQL 12, and Mailhog on an Ubuntu VPS
Step 1: Update and Upgrade the System
First, access your server via SSH and update your package index and upgrade your system packages to their latest versions.
sudo apt update
sudo apt upgrade -y
Step 2: Install Docker
Docker is a platform that enables you to create, deploy, and run applications in containers. Here’s how to install it:
- Install required packages:
sudo apt install apt-transport-https ca-certificates curl software-properties-common -y - Add Docker’s official GPG key:
curl -fsSL https://download.docker.com/linux/ubuntu/gpg | sudo gpg --dearmor -o /usr/share/keyrings/docker-archive-keyring.gpg - Set up the stable repository:
echo "deb [arch=$(dpkg --print-architecture) signed-by=/usr/share/keyrings/docker-archive-keyring.gpg] https://download.docker.com/linux/ubuntu $(lsb_release -cs) stable" | sudo tee /etc/apt/sources.list.d/docker.list > /dev/null - Install Docker Engine:
sudo apt update sudo apt install docker-ce docker-ce-cli containerd.io -y - Start and enable Docker:
sudo systemctl start docker sudo systemctl enable docker - Verify the installation:
sudo docker run hello-world
Step 3: Install Docker Compose
Docker Compose is a tool for defining and running multi-container Docker applications. Follow these steps to install it:
- Download the Docker Compose binary:
sudo curl -L "https://github.com/docker/compose/releases/download/$(curl -s https://api.github.com/repos/docker/compose/releases/latest | grep -oP '"tag_name": "\K(.*)(?=")')/docker-compose-$(uname -s)-$(uname -m)" -o /usr/local/bin/docker-compose - Apply executable permissions to the binary:
sudo chmod +x /usr/local/bin/docker-compose - Verify the installation:
docker-compose --version
Step 4: Install PostgreSQL 12
PostgreSQL is a powerful, open-source object-relational database system. Here’s how to install PostgreSQL 12:
- Add the PostgreSQL repository:
sudo sh -c 'echo "deb http://apt.postgresql.org/pub/repos/apt $(lsb_release -cs)-pgdg main" > /etc/apt/sources.list.d/pgdg.list' - Import the repository signing key:
wget -qO - https://www.postgresql.org/media/keys/ACCC4CF8.asc | sudo apt-key add - - Update the package list:
sudo apt update - Install PostgreSQL 12:
sudo apt install postgresql-12 -y - Start and enable PostgreSQL:
sudo systemctl start postgresql sudo systemctl enable postgresql - Switch to the PostgreSQL prompt:
sudo -i -u postgres psql - Exit the PostgreSQL prompt:
\q
exit
Step 5: Install MailHog
MailHog is an email testing tool for developers. It catches emails sent to it and provides a web interface to view them.
- Download MailHog:
wget https://github.com/mailhog/MailHog/releases/download/v1.0.0/MailHog_linux_amd64 - Make the binary executable:
chmod +x MailHog_linux_amd64 - Move the binary to a directory in your PATH:
sudo mv MailHog_linux_amd64 /usr/local/bin/mailhog - Create a systemd service file for MailHog:
sudo nano /etc/systemd/system/mailhog.serviceAdd the following content to the file:
[Unit] Description=MailHog service After=network.target [Service] User=ubuntu ExecStart=/usr/local/bin/mailhog [Install] WantedBy=multi-user.target - Start and enable MailHog:
sudo systemctl start mailhog sudo systemctl enable mailhog - Access MailHog’s web interface:
Open your browser and go tohttp://<your-vps-ip>:8025.
You have now installed Docker, Docker Compose, PostgreSQL 12, and MailHog on your Ubuntu VPS.
Now you are ready to begin installing the Fider platform.
Installing and Running
Step 1: Create a docker compose file
Create a /var/fider folder and copy content below into a file /var/fider/docker-compose.yml. Read the inline comments to know what each setting is used for and modify them appropriately.
version: '2'
services:
  db:
    restart: always
    image: postgres:12
    volumes:
      - /var/fider/pg_data:/var/lib/postgresql/data
    environment:
      POSTGRES_USER: fider
      POSTGRES_PASSWORD: s0m3g00dp4ssw0rd
  app:
    restart: always
    image: getfider/fider:stable
    ports:
      - "80:3000"
    environment:
      # Public Host Name
      BASE_URL: http://localhost

      # Connection string to the PostgreSQL database
      DATABASE_URL: postgres://fider:s0m3g00dp4ssw0rd@db:5432/fider?sslmode=disable

      # Generate a 512-bit secret here https://www.allkeysgenerator.com/Random/Security-Encryption-Key-Generator.aspx
      JWT_SECRET: VERY_STRONG_SECRET_SHOULD_BE_USED_HERE

      # From which account e-mails will be sent
      EMAIL_NOREPLY: noreply@yourdomain.com

      ###
      # EMAIL
      # Either EMAIL_MAILGUN_* or EMAIL_SMTP_* or EMAIL_AWSSES_* is required
      ###

      # EMAIL_MAILGUN_API: key-yourkeygoeshere
      # EMAIL_MAILGUN_DOMAIN: yourdomain.com
      # EMAIL_MAILGUN_REGION: US

      # EMAIL_SMTP_HOST: smtp.yourdomain.com
      # EMAIL_SMTP_PORT: 587
      # EMAIL_SMTP_USERNAME: user@yourdomain.com
      # EMAIL_SMTP_PASSWORD: s0m3p4ssw0rd
      # EMAIL_SMTP_ENABLE_STARTTLS: 'true'

      # EMAIL_AWSSES_REGION: us-east-1
      # EMAIL_AWSSES_ACCESS_KEY_ID: youraccesskeygoeshere
      # EMAIL_AWSSES_SECRET_ACCESS_KEY: yoursecretkeygoeshere
The Docker Compose file above defines two services: db and app. In case you’re using an external Postgres database, remove the db service and replace DATABASE_URL environment variable with your connection string.
Step 2: Pull the images and run it
Open your favorite terminal, navigate to /var/fider and run
docker compose pull
docker compose up -d
Important! If you see messages like
Error: dial tcp <ip-address>:5432: connect: connection refused. Don’t panic, that’s expected when using PostgreSQL in Docker. That happens when the application starts before the database is still ready.
You can find the logs by using docker-compose logs app. The message http server started on :3000 means everything is ok and you’re ready to go.
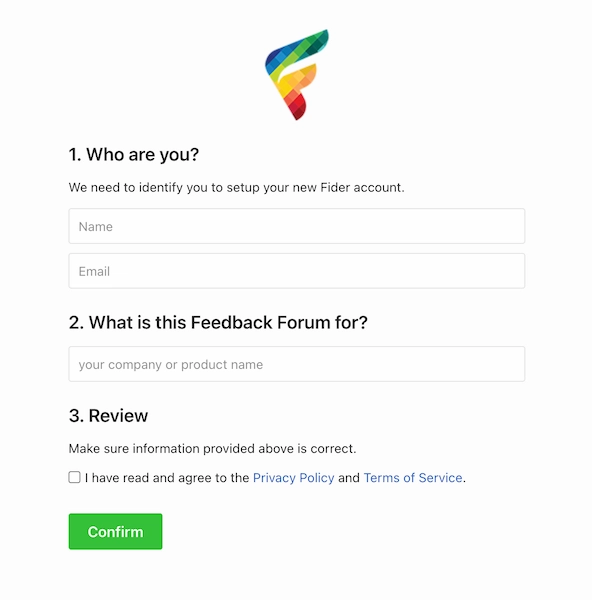
Just open your favorite browser and navigate to http://<vps_ip_address>. You should see a page like the following.

Use MailHog SMTP server
You need a valid SMTP server to start the application, or you will see panic: could not find environment variable named 'EMAIL_SMTP_HOST' errors.
Since we have already installed MailHog, we have covered our SMTP server bases, so to speak. The next step is to add a new service to your docker-composer.yml, and configure it:
  app:
    environment:
      # use this EMAIL config:
      EMAIL_SMTP_HOST: mailhog
      EMAIL_SMTP_PORT: 1025

  # add this service:
  mailhog:
    image: mailhog/mailhog
    restart: always
    ports:
      - "8025:8025"
Then restart docker compose. You can now browse to http://<vps_ip_address>:8025 and read mails sent by Fider, especially the sign-in link.
Secure Fider with HTTPS
Automatic HTTPS with Let’s Encrypt
Fider integrates with Let’s Encrypt natively, so you can have TLS without installing anything else or buying your own certificate.
To enable it:
- Ensure your app is NOT behind a proxy.
- Add the SSL_AUTO to your docker-compose.yml
- Restart your application.
version: '2'
services:
  db:
    ...
  app:
    ports:
      - "80:80"
      - "443:3000"
    environment:
      ...
      SSL_AUTO: "true"
It can take a few seconds on the initial request to generate a certificate, but after visiting your site, you’ll should see the green lock and the certificate generated for you.
NOTE: You must enable firewall access on port 80 and 443. Fider will redirect all traffic from HTTP to HTTPS.
F.A.Q.
I have submitted the installation form, but I haven’t got any confirmation email
Start with your Spam folder, it shouldn’t be there, but just be sure about that first. If not, it’s highly likely that you either input the wrong email or your email configurations are invalid. When this happens, you’ll notice that you can’t fill in that form again as you’ll be presented with a 404 page. This page will only go away when you click the confirmation link that Fider sends.
To solve this you’ll need to log into your Postgres Database and run TRUNCATE TABLE tenants RESTART IDENTITY CASCADE;. This command will purge all the data from Fider, thus making the installation page available again. You may now change your email configurations and try again. You can repeat this as much as you need.
Conclusion
You now know how to install and run open source feedback portal to gather feature requests and customer suggestions.
Resource: https://fider.io/docs


