
Prerequisites
Before you start the process of OS installation using IPMI, make sure you fulfill the following requirements:
- System has to be set to OnBoard(VGA) video output
- Network connection with either Dedicated IPMI port or Eth0(w/Shared IPMI port)
READ ALSO: How to Choose the Best Dedicated Server Hosting Services
How to Install OS via IPMI
To install OS via IPMI for dedicated servers, follow the guide below.
Here are the steps you need to take to utilize IPMI remote connection for OS installation:
Step 1 – Login to the target system by using IPMI web GUI (Java is required).
- Login – ADMIN
- Password – ADMIN
Step 2 – Go to the tab “Remote Control” and select “Console Redirection”

Step 3 – Click on “Launch Console”
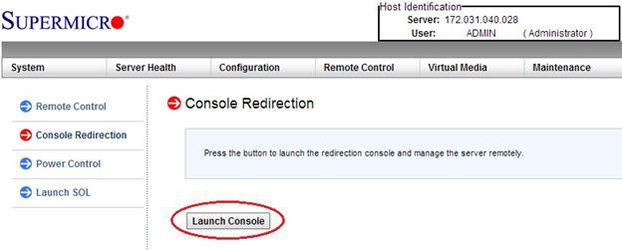
Step 4 – A small file “Launch.jnlp” will be downloaded, run the file and the remote window will be opened
Step 5 – In the remote window, go to “Virtual Media” and select “Virtual Storage”
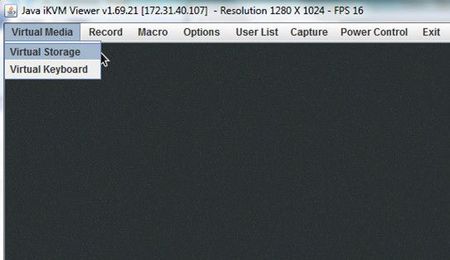
Step 6 – Select “Logical Drive Type”, typical drive type is “ISO”
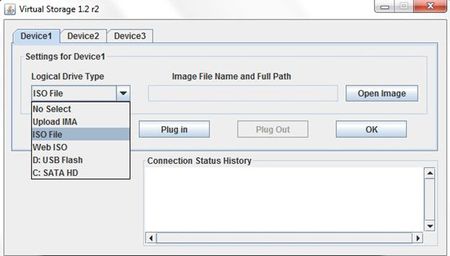
Step 7 – Click “Open Image” to select the image file location, could be local in your PC or network shared drive.
Step 8 – Click “Plug in” and then click “OK” to mount the virtual drive, Device connection is now plugged-in, the setup is now done.
** Click “Plug out” to unmount it
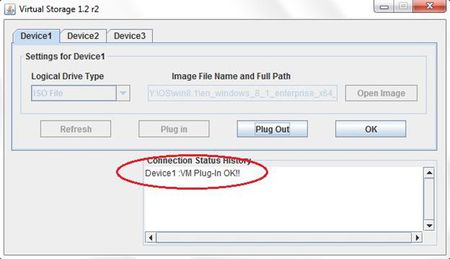
Step 9 – Reboot the system. Press <F11> when the BIOS bootup option display
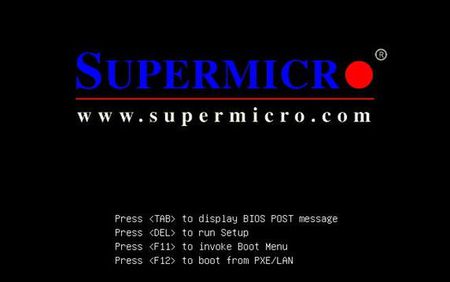
Step 10 – Select the boot device to “Virtual CDROM”
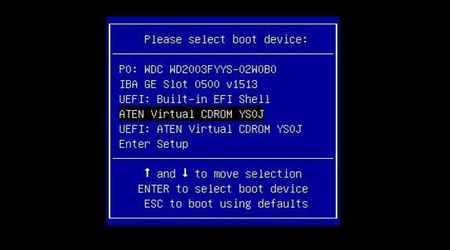
Step 11 – System will boot up from the virtual CD-ROM and now you can start the OS installation
Conclusion
You now know how to install OS via IPMI for dedicated servers.


