This article provides a guide for how to integrate VPS Reseller with WHMCS. We will start by installing the WHMCS module for reselling VPS Servers. Follow the guide below to integrate VPS Reseller WHMCS module, and enable API and module connection to resell VPS hosting.
Getting Started with VPS Reseller with WHMCS
Please follow the below guidelines to configure your VPS Reseller with WHMCS integration.
Prerequisites
- WHMCS installation
- VPS Reseller account
- WHMCS server has ports 4081-4085 open (Guide: How to Open Ports on Linux Server)
Recommended First Steps
Install WHMCS VPS Module
- Download and extract the WHMCS integration [HERE].
- Copy the entire directory via FTP, SFTP, SCP, etc. to WHMCS directory
- Ensure the existence of /<your_whmcs_location>/modules/servers/rad_cloud
- Ensure the existence of /<your_whmcs_location>/modules/addons/rwhserverimport
Get API Credentials
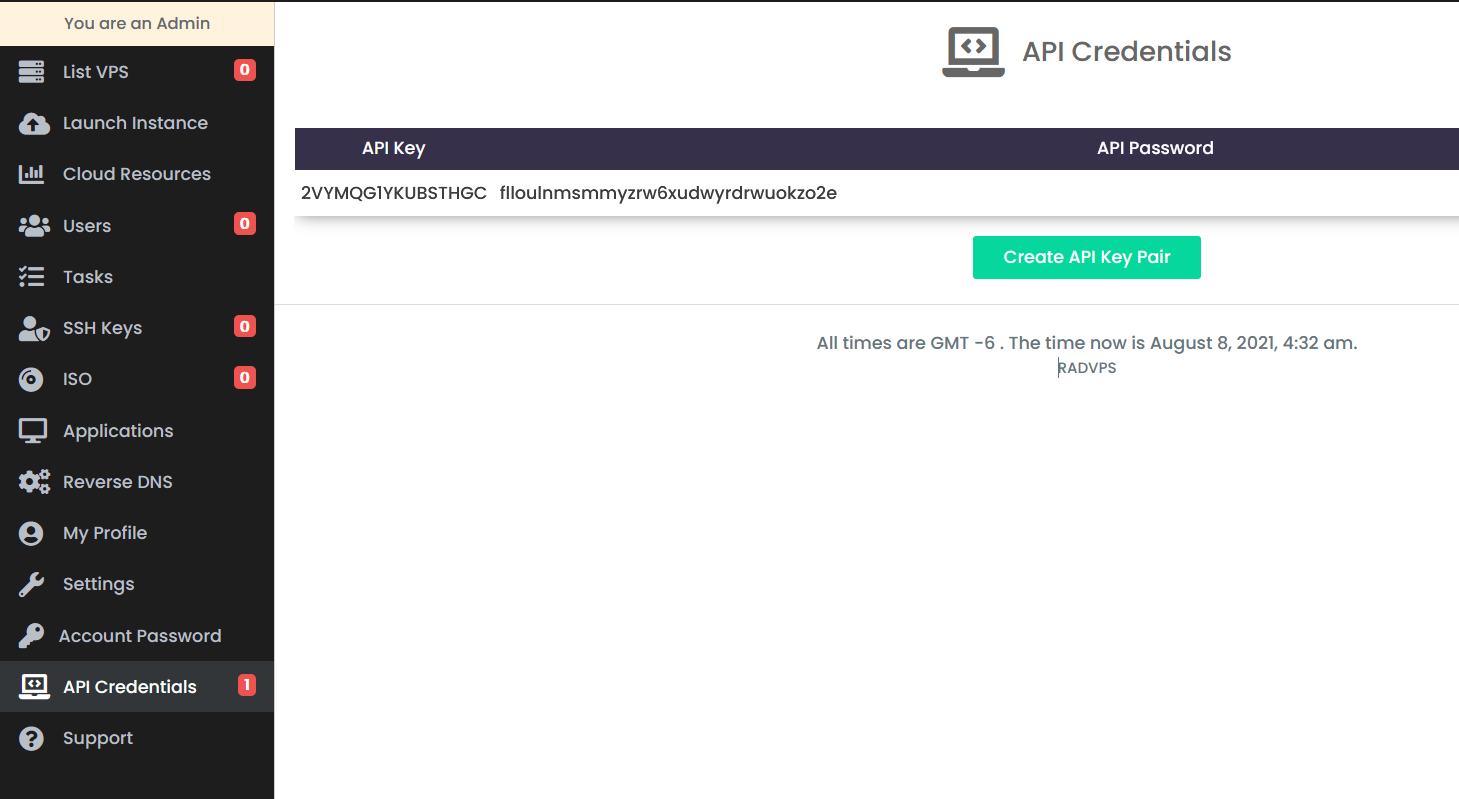
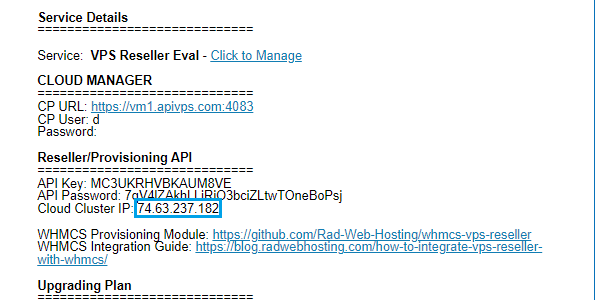
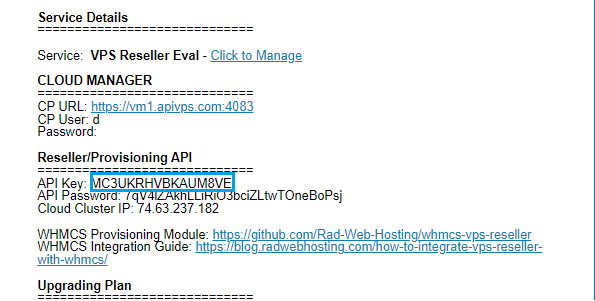
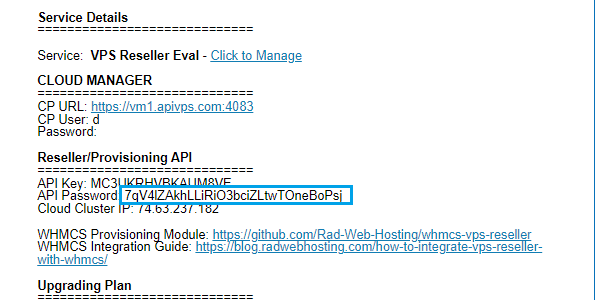
- A VPS Reseller Welcome Email was sent with the required API Credentials after payment confirmation.
- In case you do not have this email, you can view it in your Rad Web Hosting client dashboard.
- Login to Rad Web Hosting client dashboard.
- Retrieve API key and Secret from VPS Reseller Welcome Email (Subject: “Your VPS Reseller Account is Deployed”). View guide: Viewing Email History in Hosting Dashboard
- Copy the API key pair credentials (these will be needed to configure WHMCS server connection).

Create Server in WHMCS Admin
You must now create a server in the WHMCS admin.
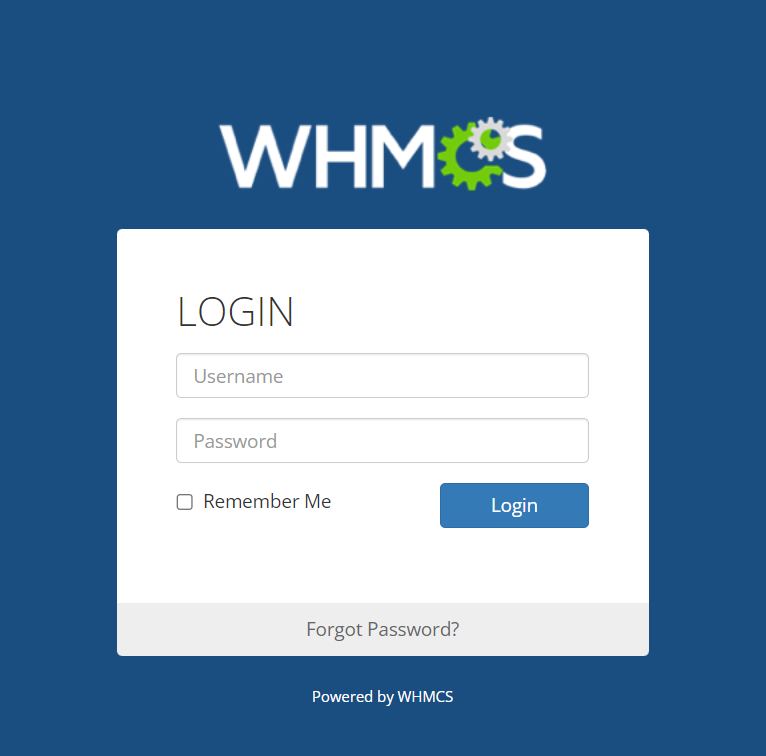
- Login to your WHMCS admin area.

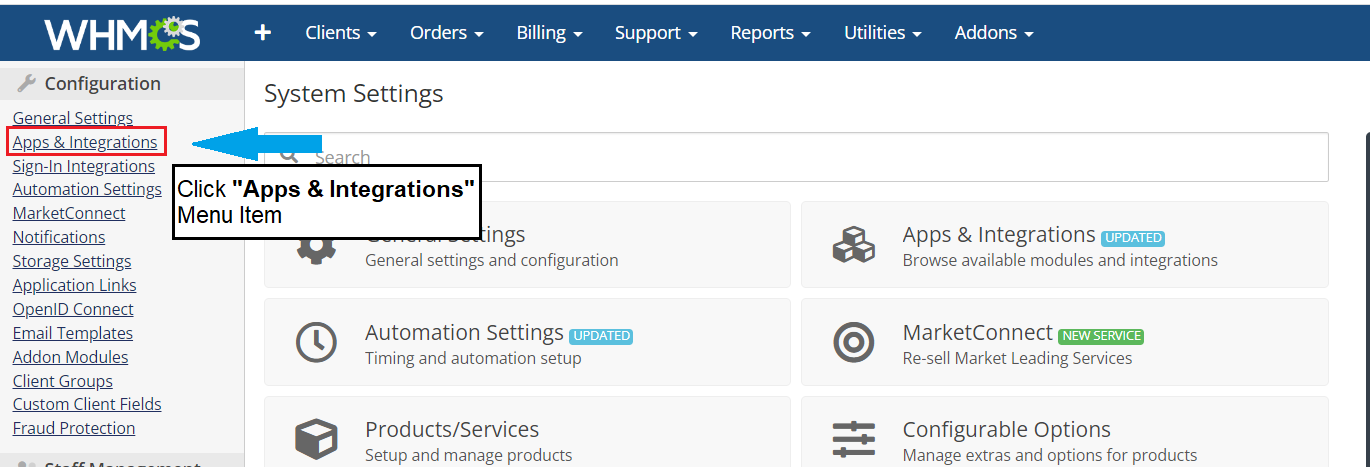
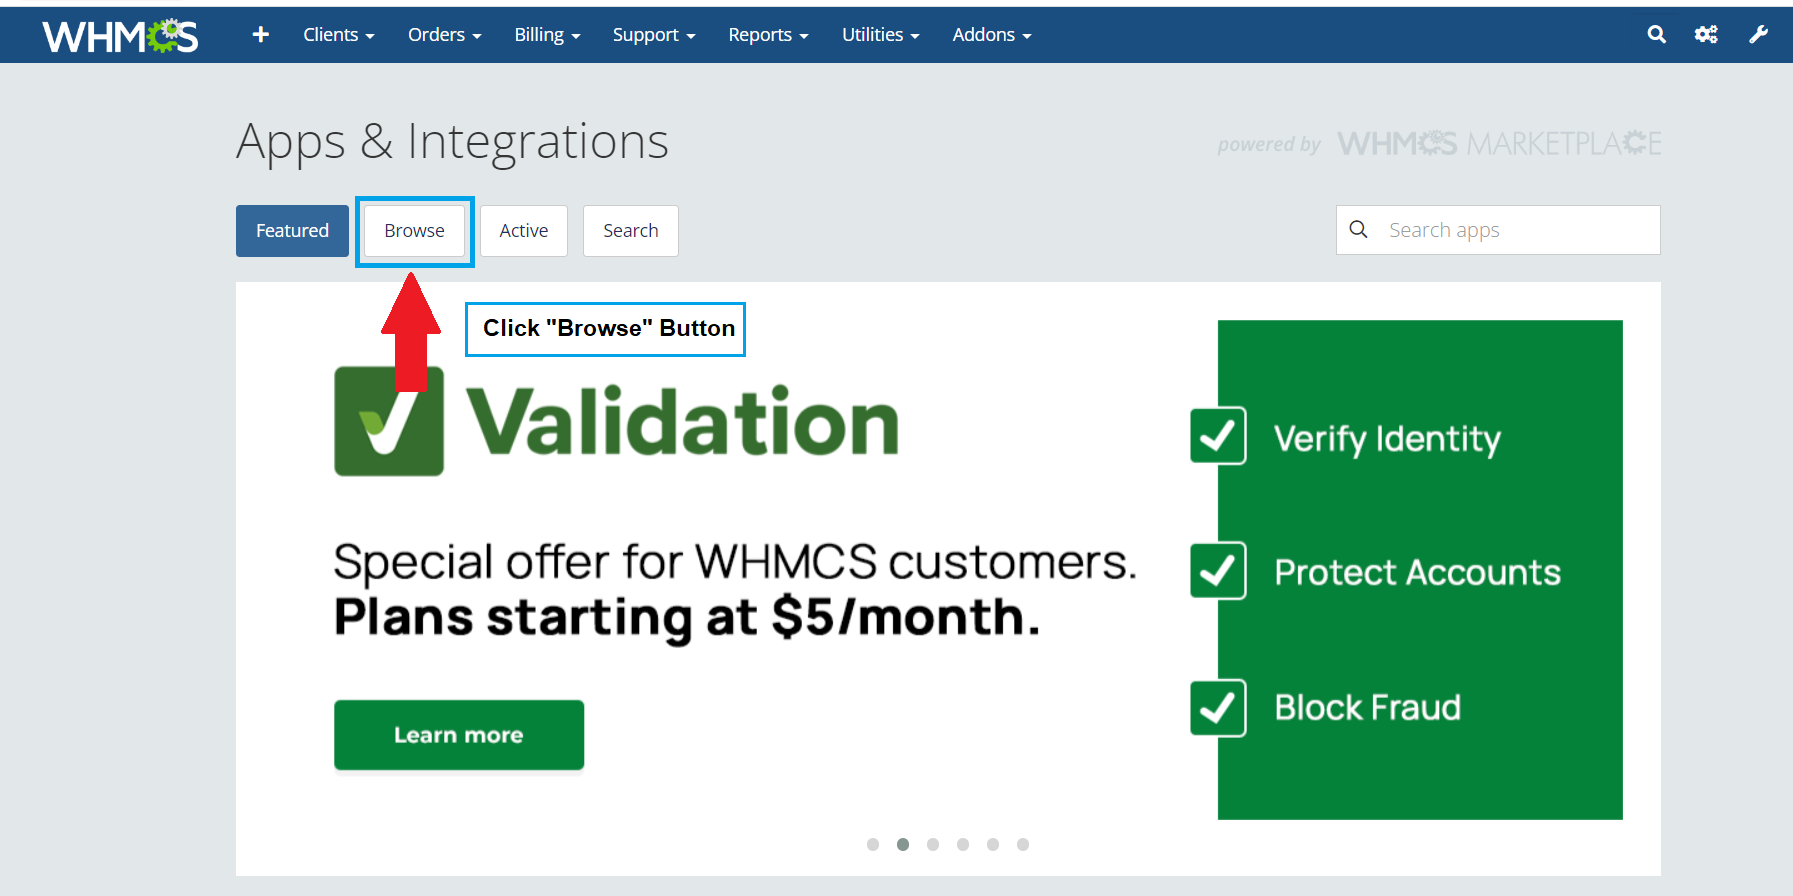
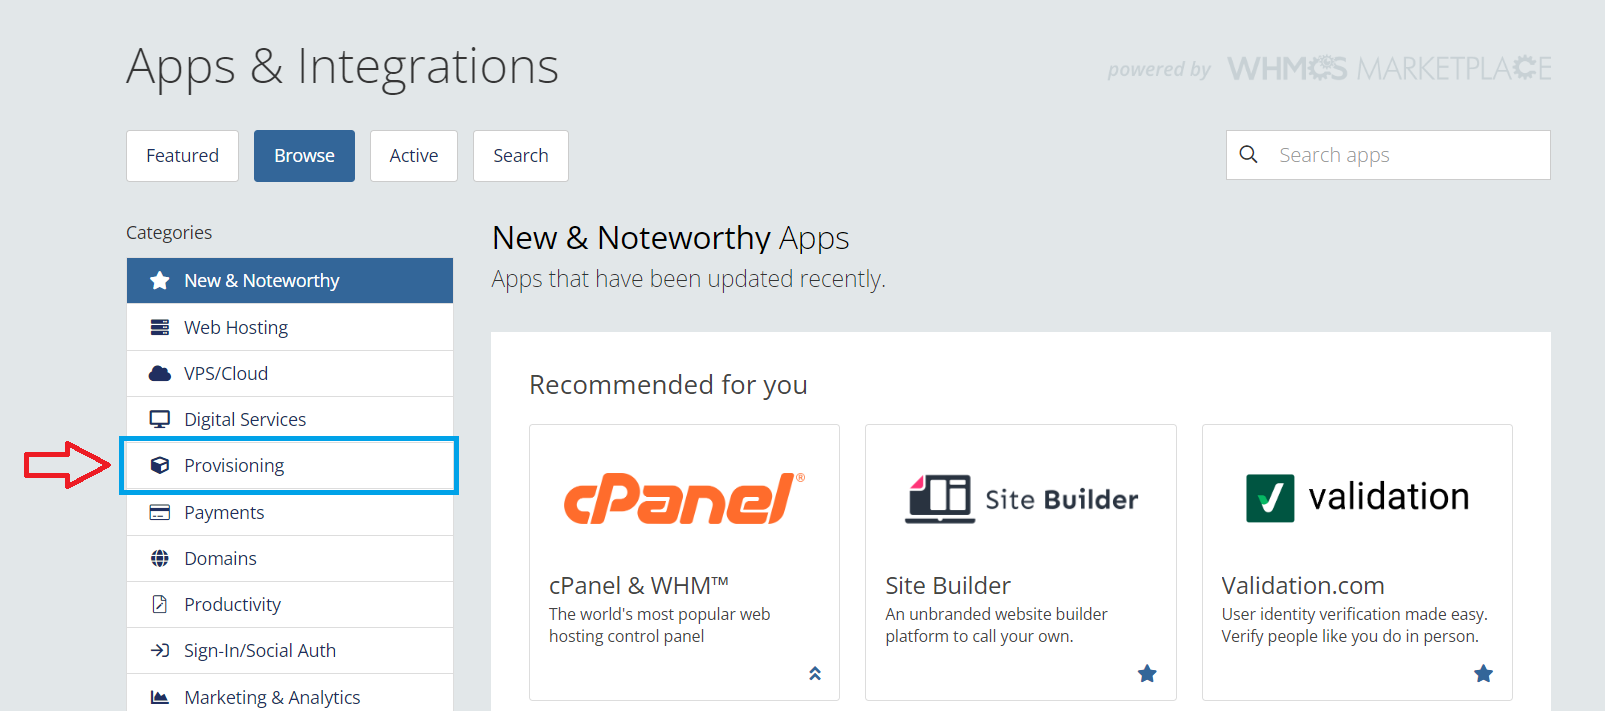
- From WHMCS Admin > Setup > Apps & Integrations > Browse > Provisioning
-
- Select “Apps & Integrations” from Configuration Menu Items

- Choose “Browse” Option

- Choose “Provisioning” category

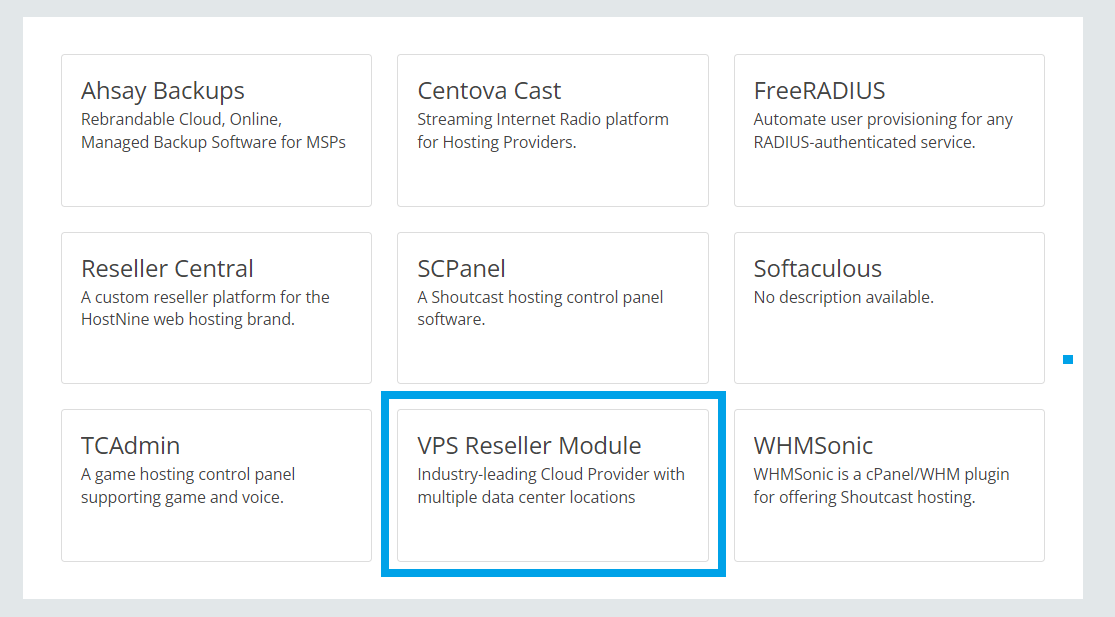
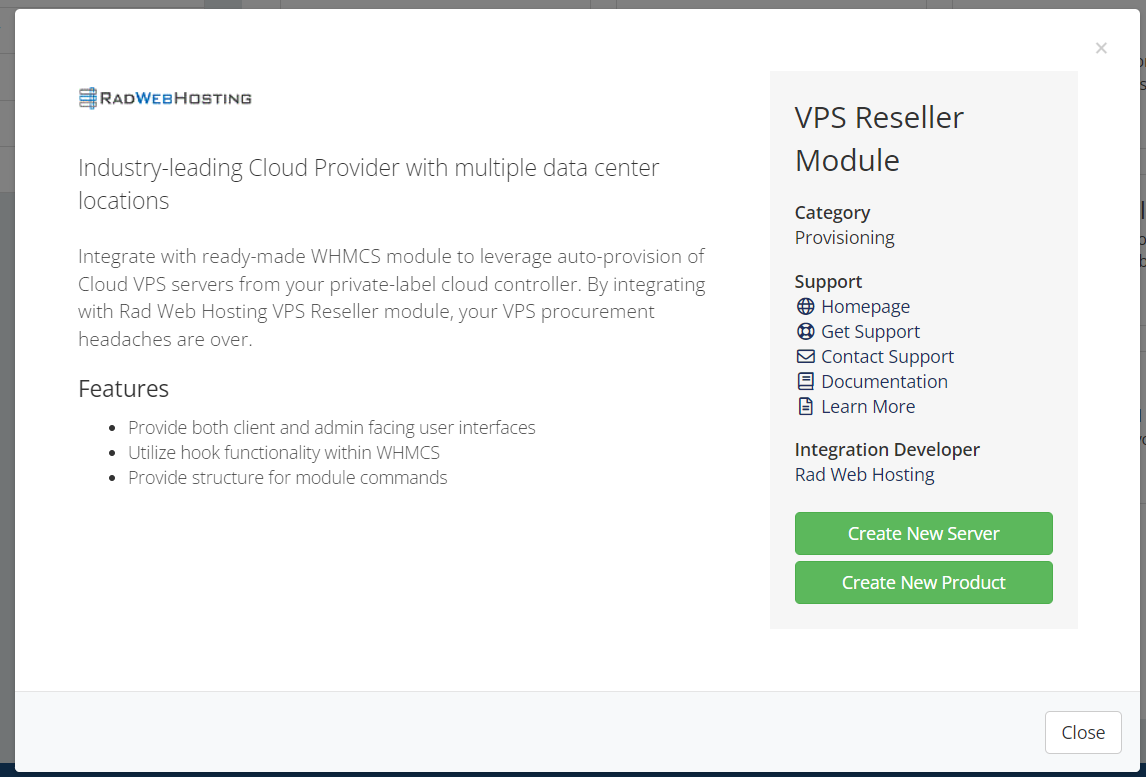
- Click the “VPS Reseller Module”

- Viewing VPS Reseller Module Application Details

- Select “Apps & Integrations” from Configuration Menu Items
-
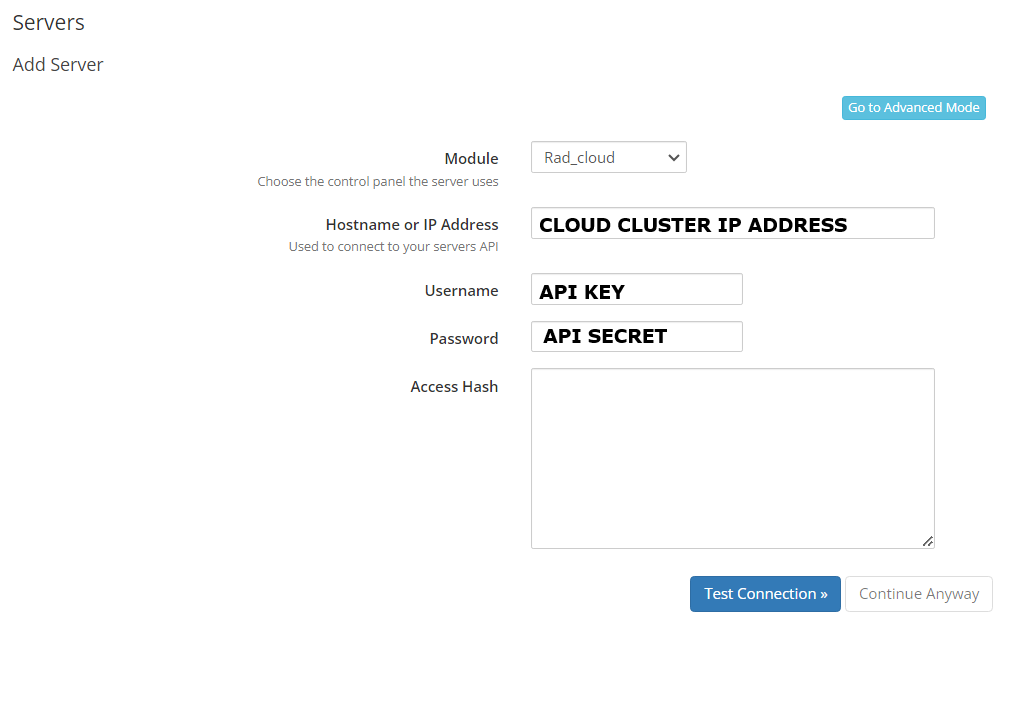
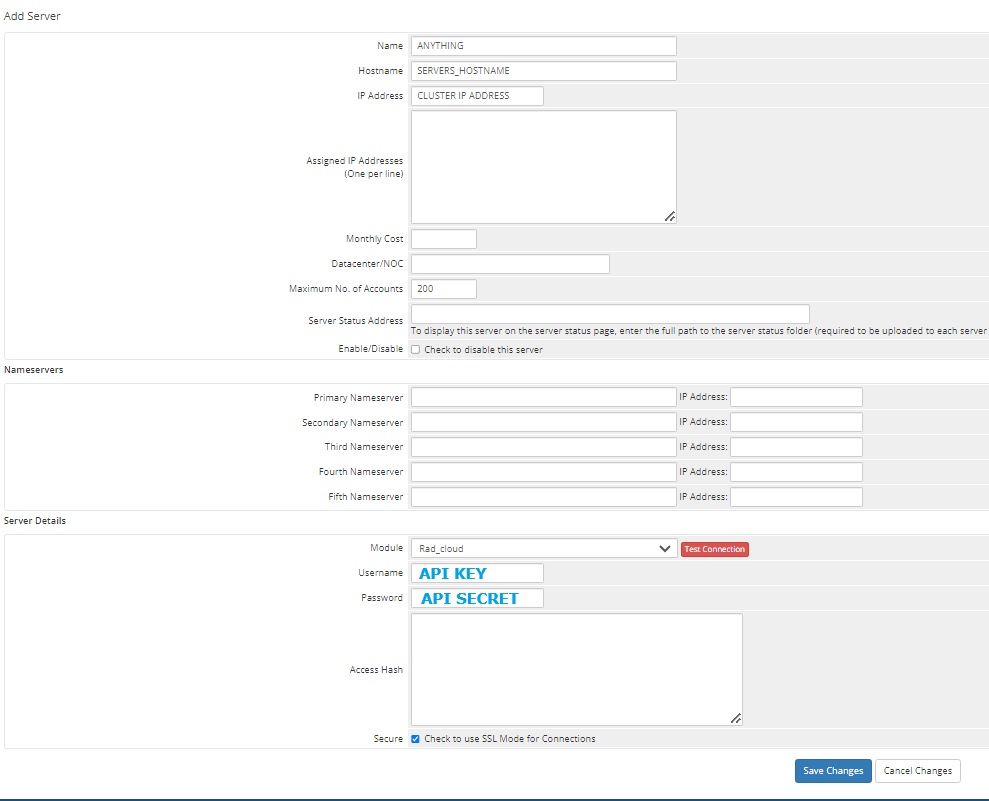
- Click “Create New Server”. Follow directions:
-
- Module: Rad_cloud
- Hostname or IP Address: Cloud Cluster IP (provided in Welcome Email)

- Username: API KEY (provided in Welcome Email)

- Password: API PASSWORD (API SECRET) (provided in Welcome Email)
 Enter the values in the provided fields:
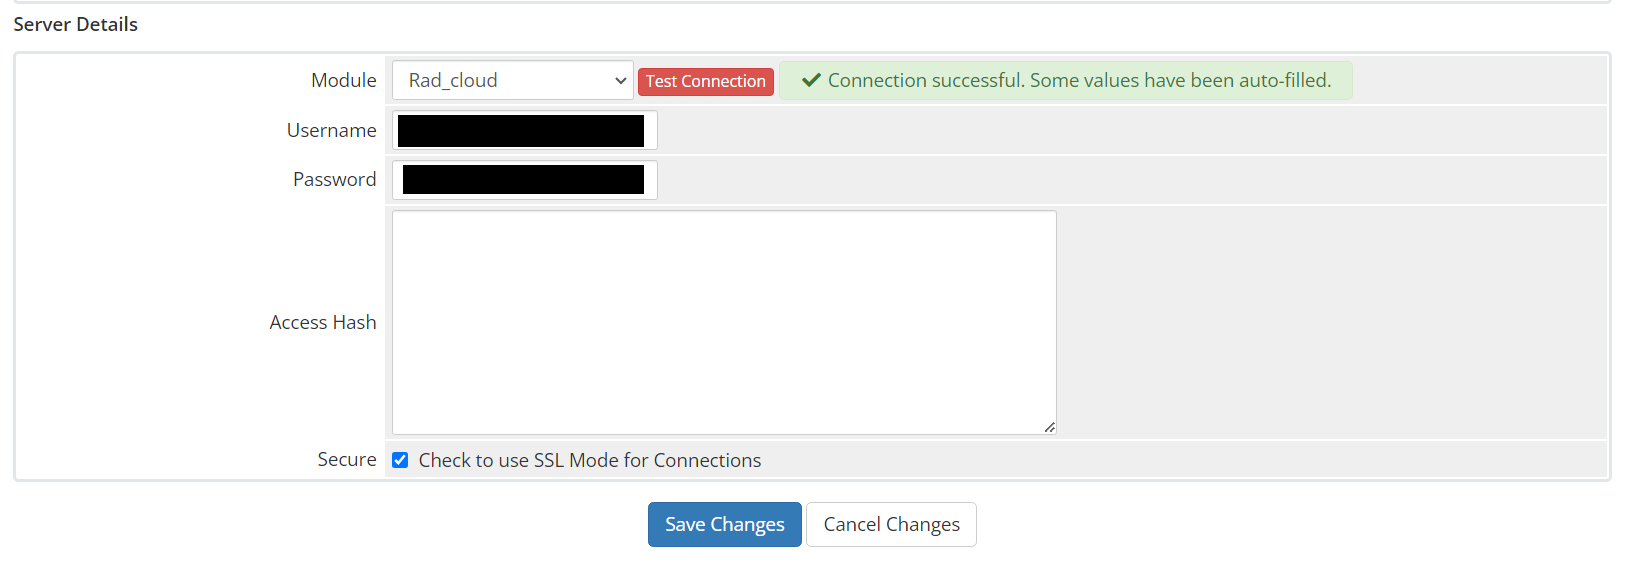
- Click “Test Connection” to validate configuration. In case of error, check to ensure your WHMCS server has ports 4081-4085 opened. (View: How to Open Ports on Linux Server)
- Click “Add Server” to add this server to WHMCS

- Click “Test Connection” button to verify server connectivity:

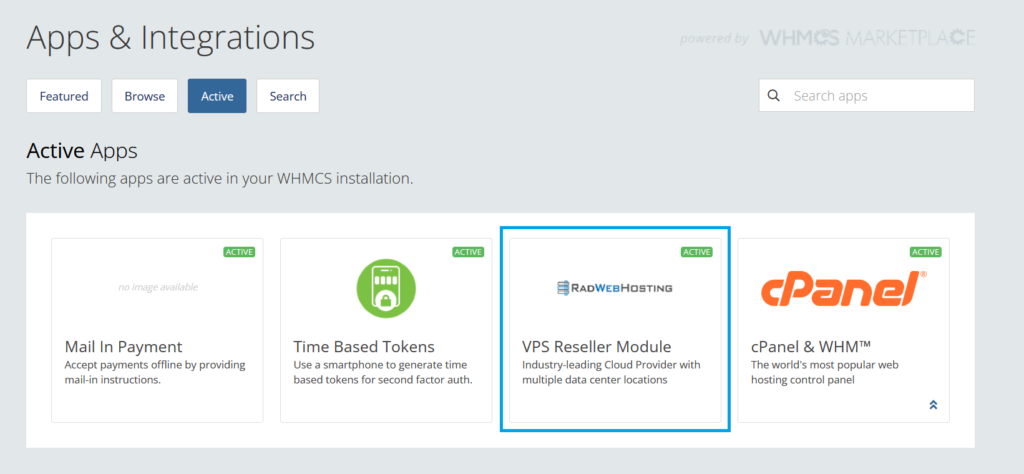
You can now find the server module at WHMCS Admin > Setup > Apps & Integrations > Active:

-
Rad Cloud Server Import WHMCS Addon Guide
This article provides a guide for how to enable and run the Rad Cloud Server Import WHMCS addon module.
What is Rad Cloud Server Import Addon Module?
As of v2.0.0, or later, of WHMCS VPS Reseller module, an addon module, ‘Rad Cloud Server Import’ is bundled with the ‘Rad_cloud’ server module. The ‘Rad Cloud Server Import’ addon enables possibility to import pre-configured Cloud VPS products with ‘Rad_cloud’ server integrations.
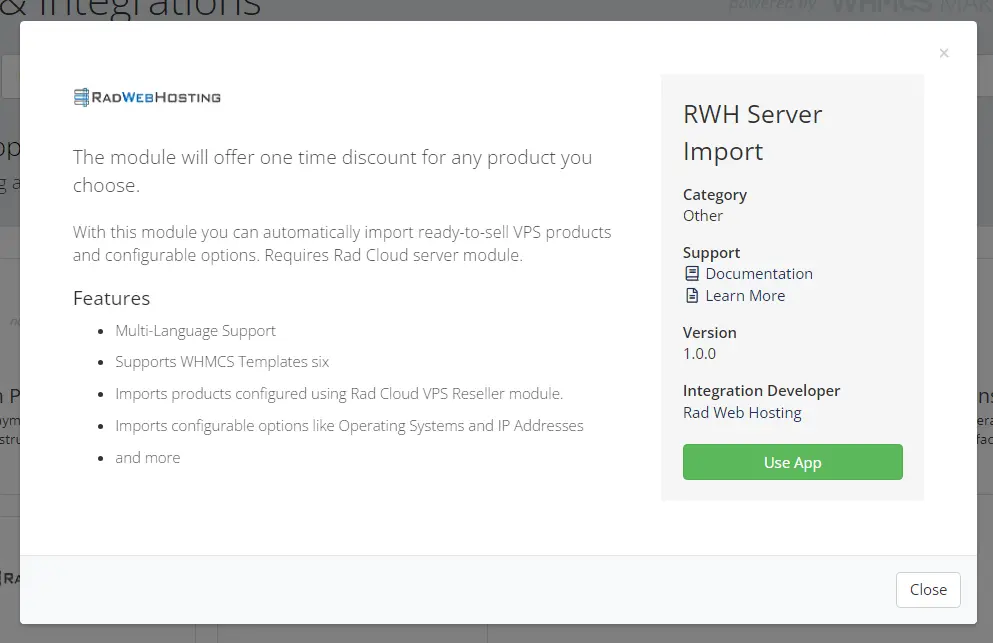
Features of Rad Cloud Server Import Addon:
- 1-click creation of ready-to-sell Cloud VPS products
- Setup imported products options (Product Group, Welcome Email Template, Import Level)
- Automatic configuration of all required ‘Rad_cloud’ server options
- From installation to VPS selling in under 3 minutes
Rad Cloud Server Import Addon Prerequisites
This guide assumes the following system and environment requirements are met:
- Rad Cloud API Account
- Rad_cloud server module installed & connected
- Rad Cloud Server Import addon module installed
How to Enable Rad Cloud Server Import Addon Module for WHMCS
To enable Rad Cloud Server Import addon module for WHMCS, follow the steps:
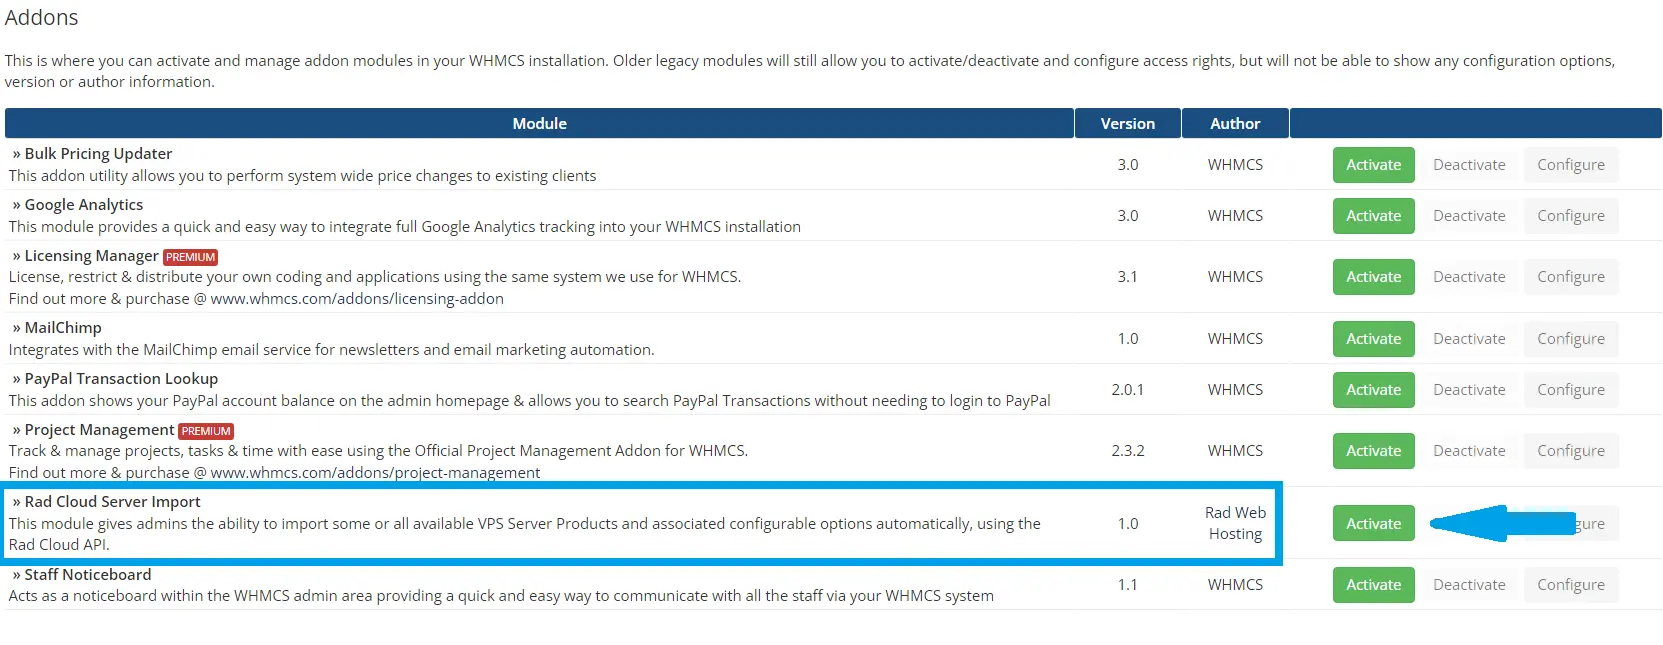
- Navigate to the Addon Modules settings interface (Access from ‘/whmcs/your_admin/configaddonmods.php’, where “your_admin” is the WHMCS admin directory).
- Click the “Activate” button corresponding with the “Rad Cloud Server Import” module:

- Click “Configure” to configure the module access group.
- Choose “Full Administrator” and click “Save Changes” to enable the settings:

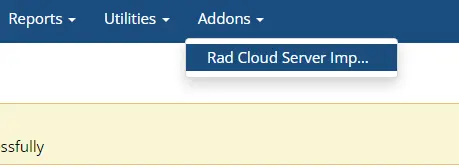
- Navigate to ‘Rad Cloud Server Import’ from the Addons dropdown menu:

- (STEP 1) From the Rad Cloud Server Import Manager, click “Continue” to initiate Rad Cloud Server Import process:

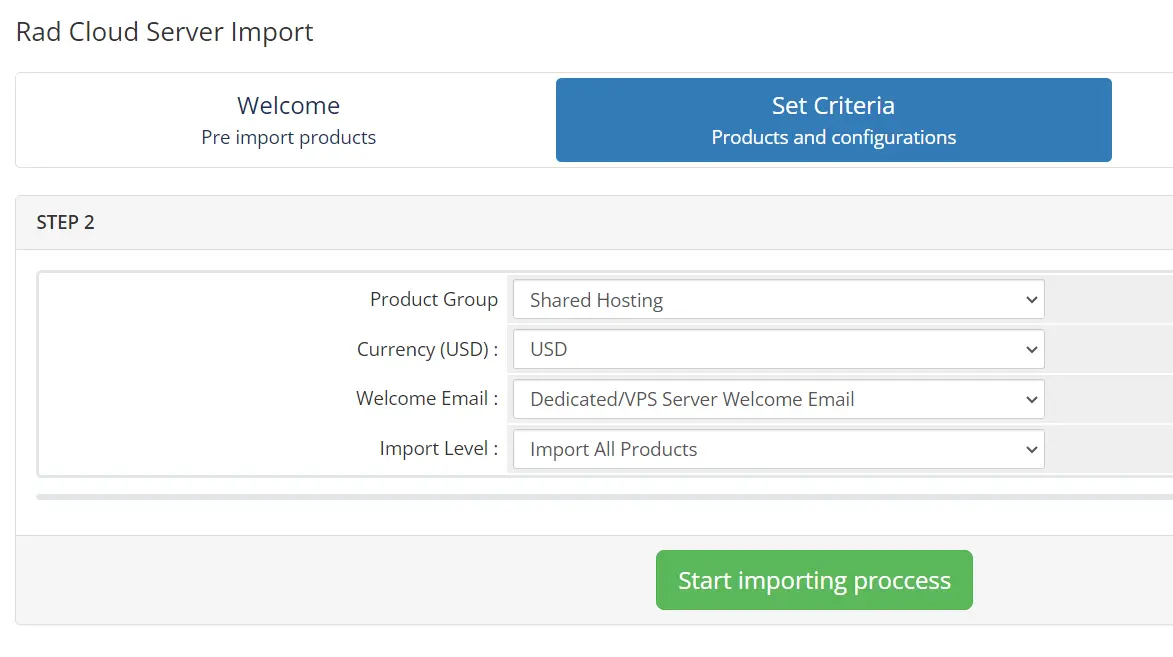
- (STEP 2) Configure the Import Settings according to your preferences:

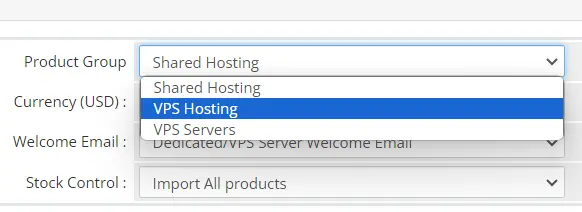
- (STEP 2) Configure the Product Group imported products should be assigned to:

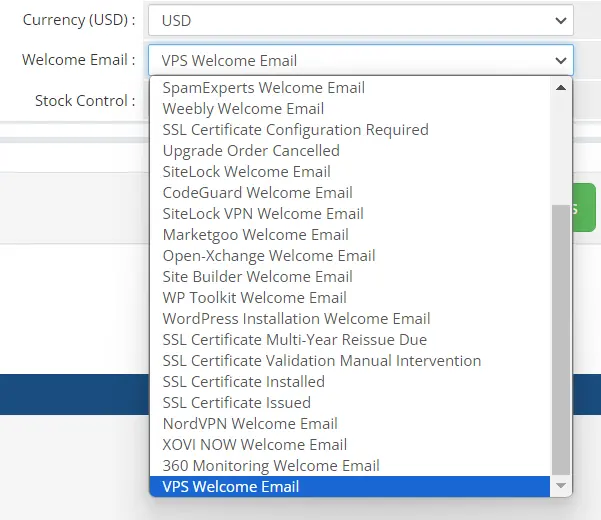
- (STEP 2) Configure the Welcome Email template imported products should use:

- (STEP 2) Select “Import Level” value (‘Lite Import’ recommended for new installs)
- (STEP 2) Once all options set, click “Start Importing Process” button to initiate import
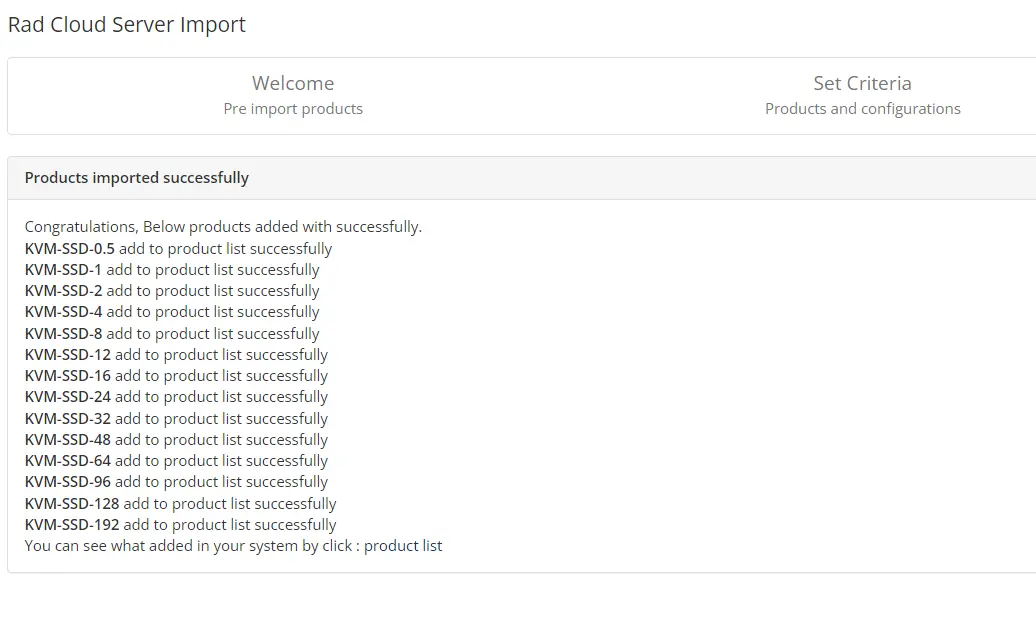
- (STEP 3) Receive confirmation of successfully imported products and list of products:

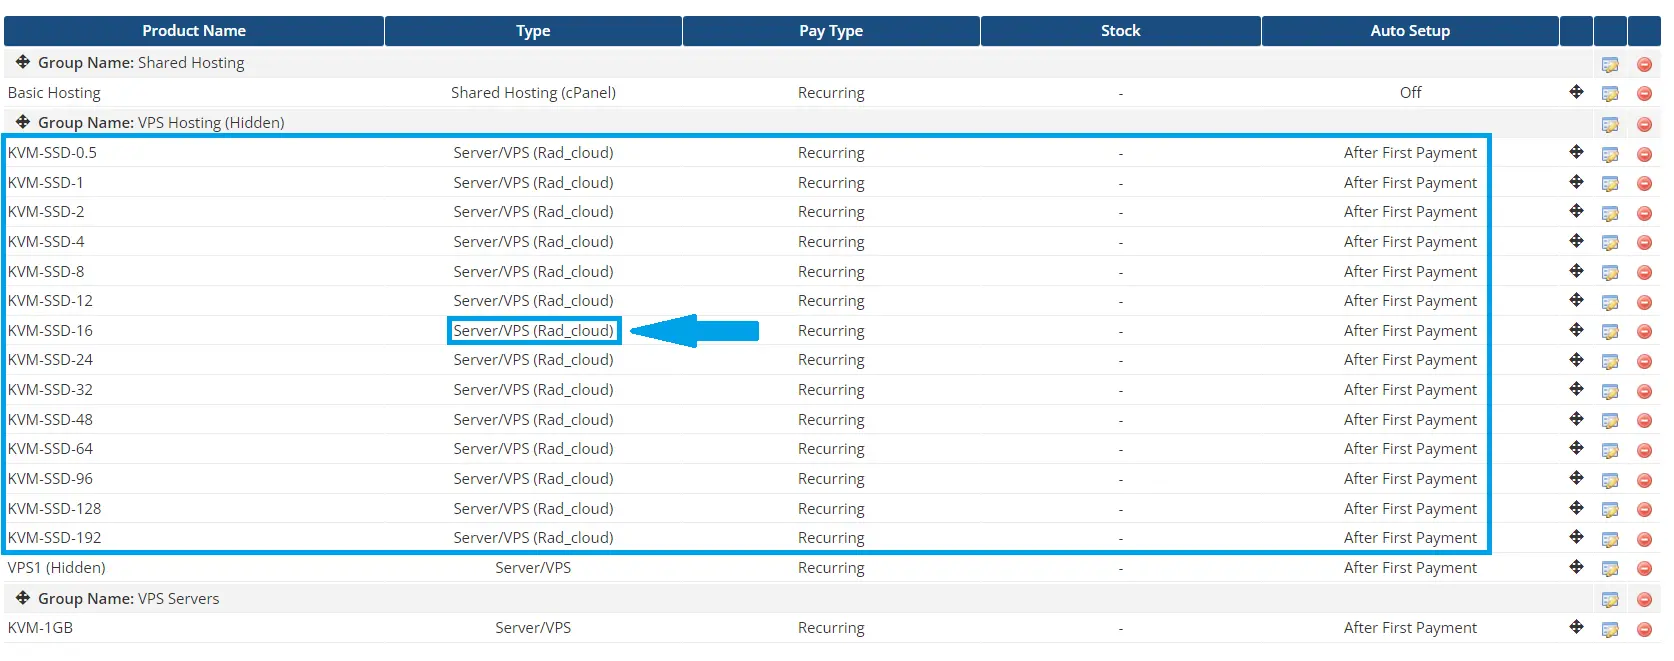
- Navigate to Products/Services settings page in WHMCS Admin for overview:

(Recommended) Optional WHMCS Integration Customization
We also highly recommend the following steps:


 Enter the values in the provided fields:







[…] 5 Minute Guide to Integrate WHMCS VPS Reseller […]
[…] Recommended: 5 Minute Guide to Integrate WHMCS VPS Reseller […]
[…] READ ALSO: 5 Minute Guide to Integrate WHMCS VPS Reseller […]
[…] struggling to keep up with the ever-increasing demands of your customers? Look no further! With WHMCS integration, you can revolutionize your business by automating the entire provisioning process. […]
[…] READ ALSO: 5 Minute Guide to Integrate WHMCS VPS Reseller […]
[…] 5 Minute Guide to Integrate WHMCS VPS Reseller […]
[…] READ ALSO: 5 Minute Guide to Integrate WHMCS VPS Reseller […]
[…] RECOMMENDED GUIDE: 5 Minute Guide to Integrate WHMCS VPS Reseller […]
[…] SEE ALSO: 5 Minute Guide to Integrate WHMCS VPS Reseller […]
[…] 5 Minute Guide to Integrate WHMCS VPS Reseller […]
[…] READ ALSO: 5 Minute Guide to Integrate WHMCS VPS Reseller […]