This post provides a guide for how to launch a FreeBSD 14 VPS server from Rad Web Hosting.
How to Launch a FreeBSD 14 VPS Server
Well, FreeBSD 14 is officially here! If you’re a BSD user, you probably want to get your hands on it quickly. So, this guide aims to help you accomplish that, without delay!
What’s New in FreeBSD 14.x?
FreeBSD 14.0-RELEASE contains a summary of the changes made to the FreeBSD base system on the 14-STABLE development line. For more on FreeBSD 14, you can read the official release announcement.
The release notes list applicable security advisories that were issued since the last release, as well as significant changes to the FreeBSD kernel and userland.
Some of the notable new features in FreeBSD 14 include:
- FreeBSD replacing sendmail with dma.
- Kinst as a new DTrace provider.
- makefs adding ZFS support.
- boottrace is a new interface for capturing trace events during system boot and shutdown processes.
- The kernel TLS offloading handling receive-side offloading of TLS 1.3.
- Initial WiFi 6 support in WPA.
- sh is now the default shell for the root user.
- An updated LLVM toolchain.
Please note that this is not an exhaustive list of all the changes in FreeBSD 14.0-RELEASE.
VPS Server Environment
For this guide, we will be using the following server environment:
- Plan: KVM-SSD-1
- CPU: 1 Core
- RAM: 1 GB RAM
- Disk: 16 GB SSD
- Network: 1Gbps
- 1 IPv4 (Public)
- /64 IPv6 (Public)
- View more: FreeBSD VPS Servers
Steps to Install FreeBSD 14 on Your VPS
In order to launch a FreeBSD 14 VPS server, follow the steps below:
- Order a cheap VPS server.
- Grab your login details from the VPS welcome email, which should arrive in your inbox within 30 seconds of order completion. View this guide to find this email in your Rad Web Hosting account.
- Login to the cloud panel using the credentials found in the Welcome Email.
- Navigate to your new VPS using the side menu (Cloud Panel Home -> List VPS -> Click the “>” button to manage VPS).
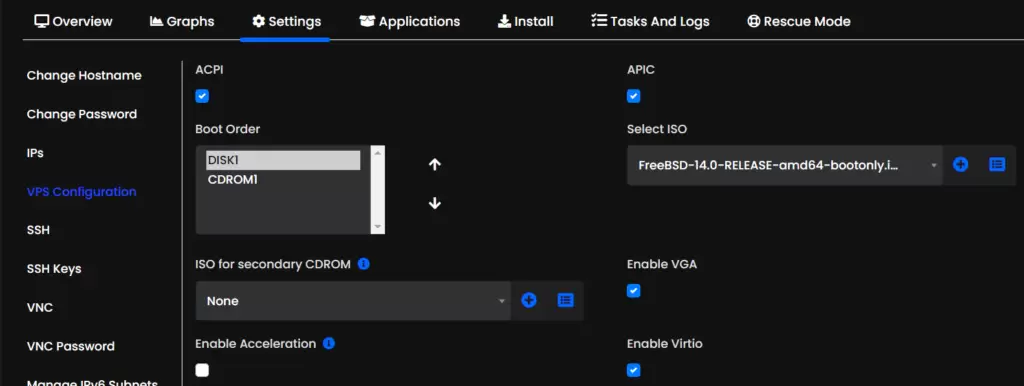
- Navigate to the “VPS Configuration” interface (VPS Manager -> Settings -> VPS Configuration).
- Under the “Boot Order” options, move the “CDROM1” disk to the top position to load this media upon reboot.

- Reboot the VPS.
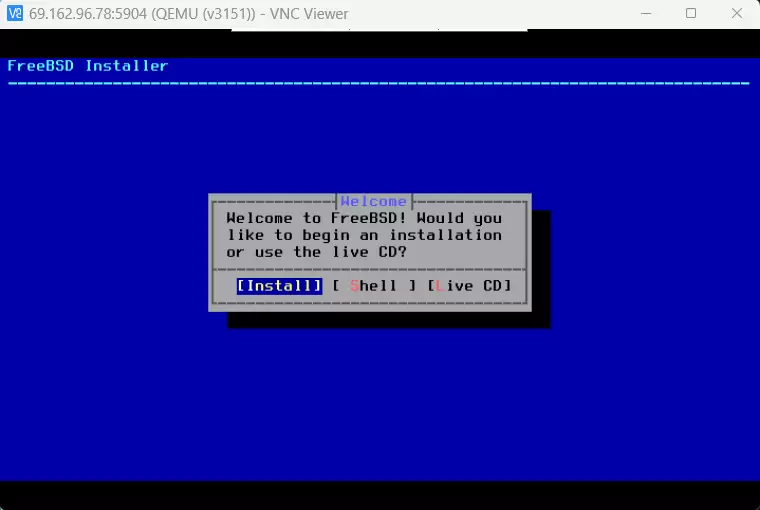
- Open your preferred VNC client and access the VPS console.
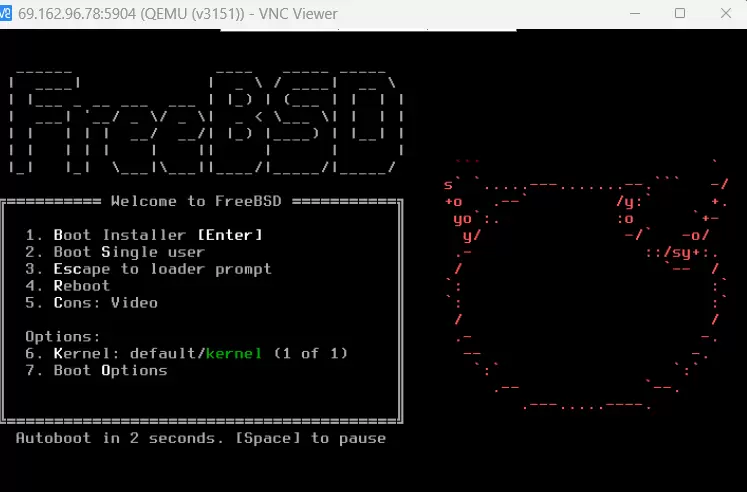
- Once connected, choose the “Install” option from the FreeBSD Installer welcome screen.

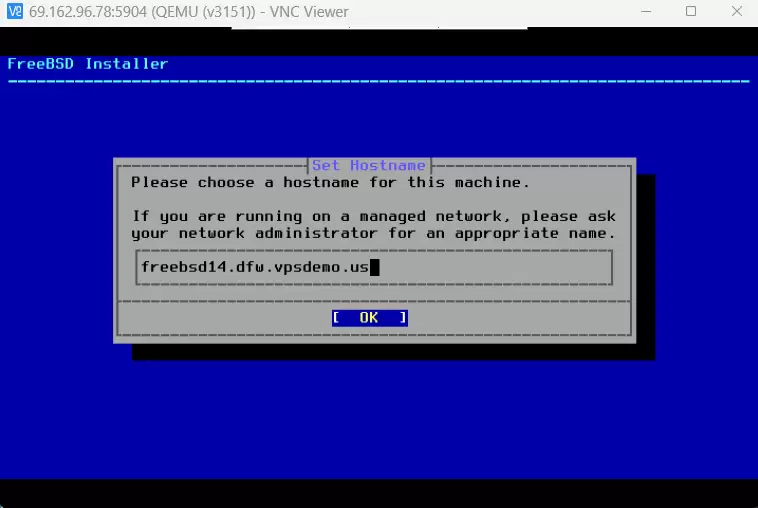
- Now, set your preferred hostname.

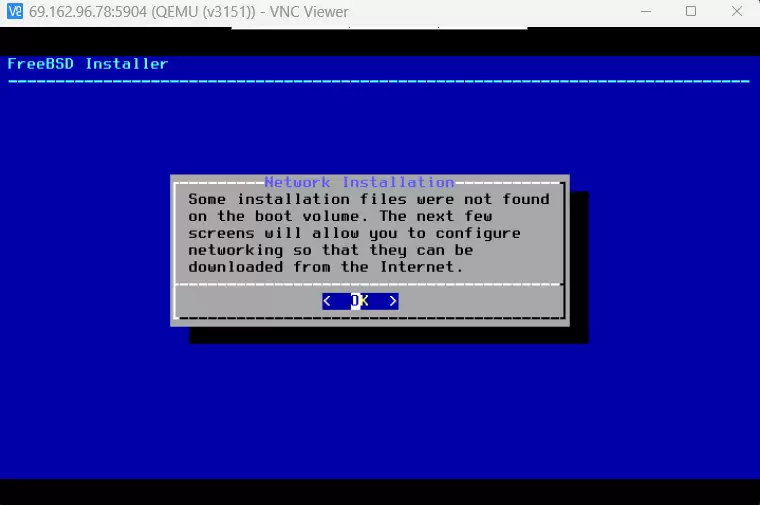
- If you’re using the ISO provided by Rad Web Hosting, you’ll be starting from the “-bootonly” disk, so you’ll want to follow the prompts to complete the installation from the official repository. Alternatively, view this guide for instruction to upload any custom ISO media.

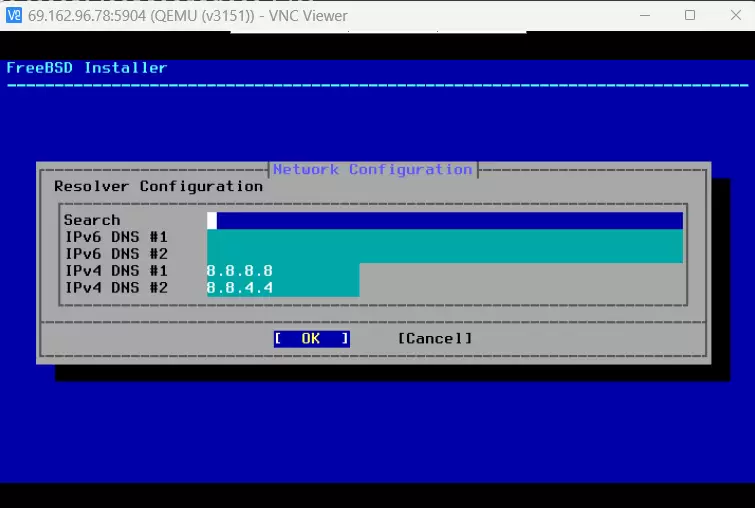
- Next, configure the DNS resolvers. If unsure, we recommend using “8.8.8.8” and “8.8.4.4” (Google’s public DNS).

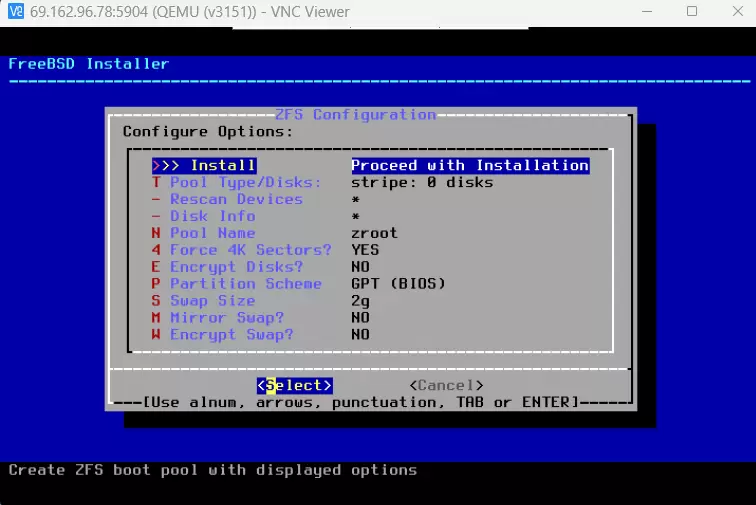
- FreeBSD 14 supports ZFS file system, so configure the ZFS pool details.

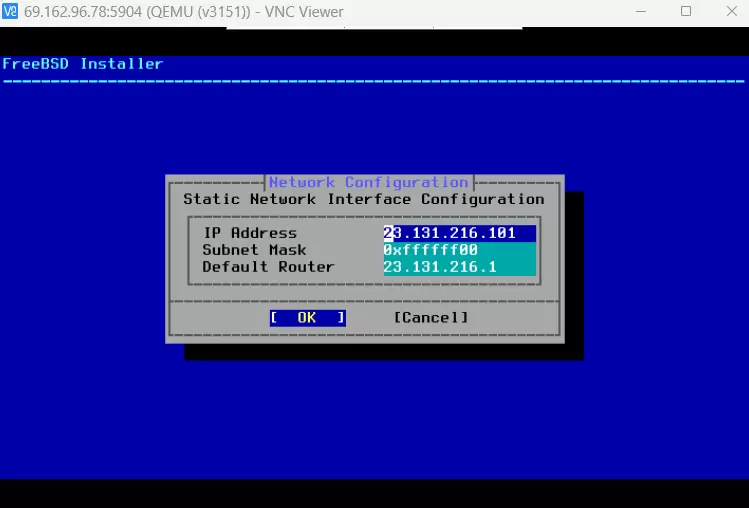
- Now, configure the network interface details. This step is also important to enable public network (required for installing the FreeBSD packages).

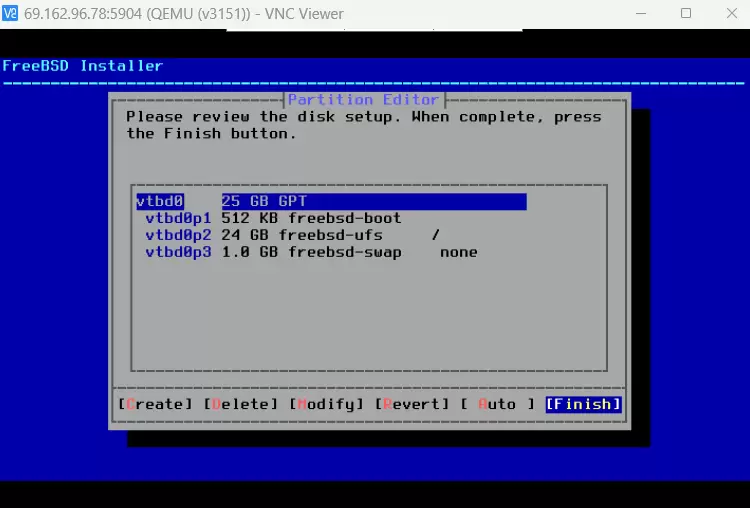
- Next, edit the FreeBSD VPS partitions according to your preference.

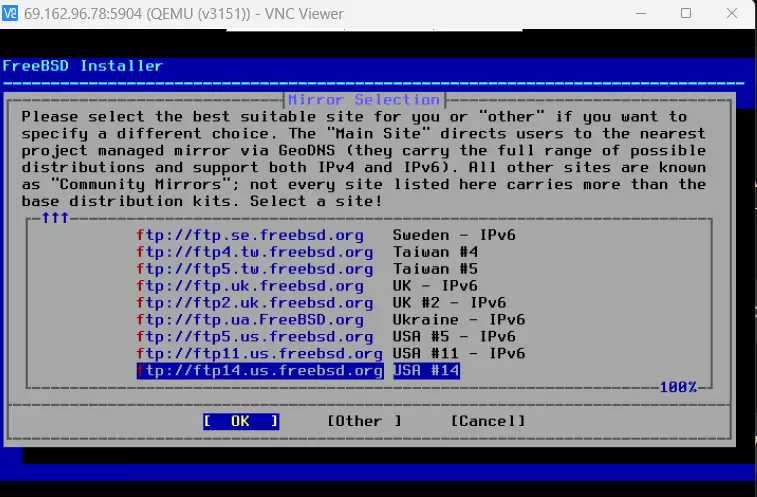
- Select your preferred FreeBSD mirror for installation or choose the first option to allow your VPS to find the closest available mirror.

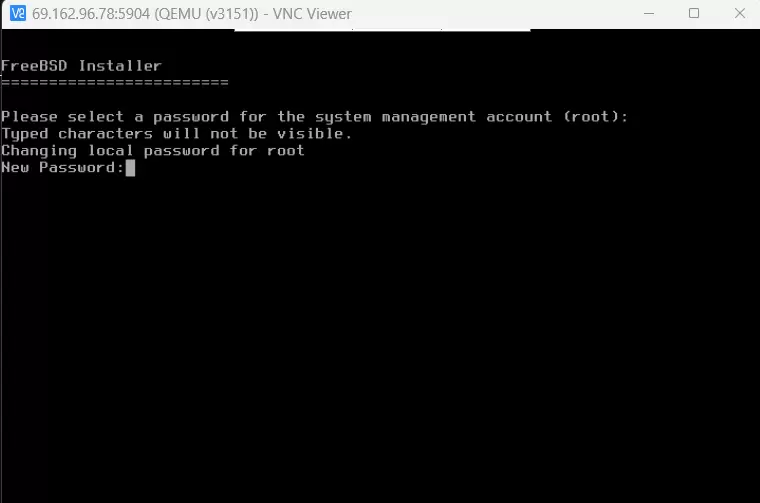
- Reset your Root password that will be used to access the FreeBSD VPS upon completed install.

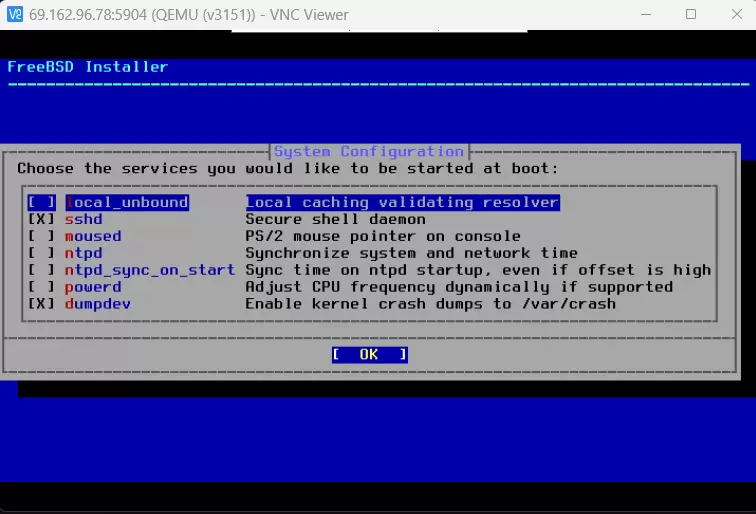
- Configure services to start on VPS boot.

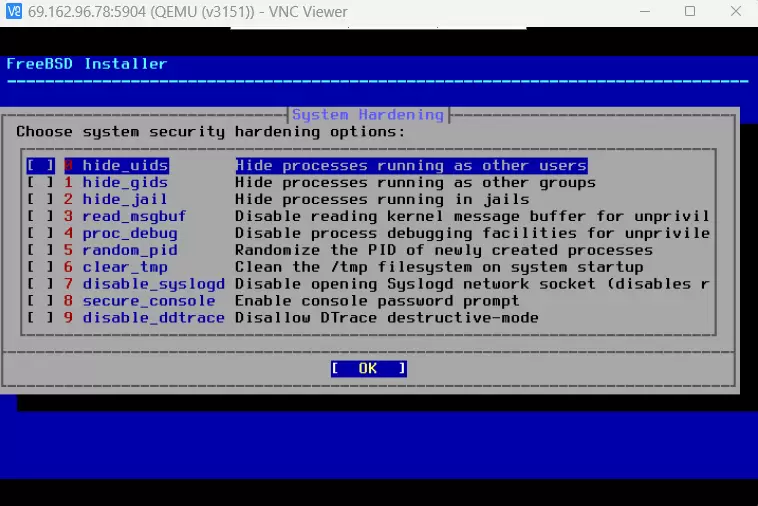
- Configure system hardening to secure the FreeBSD VPS.

- Now, click to start the automated installation of FreeBSD 14 system files and services from the repository.
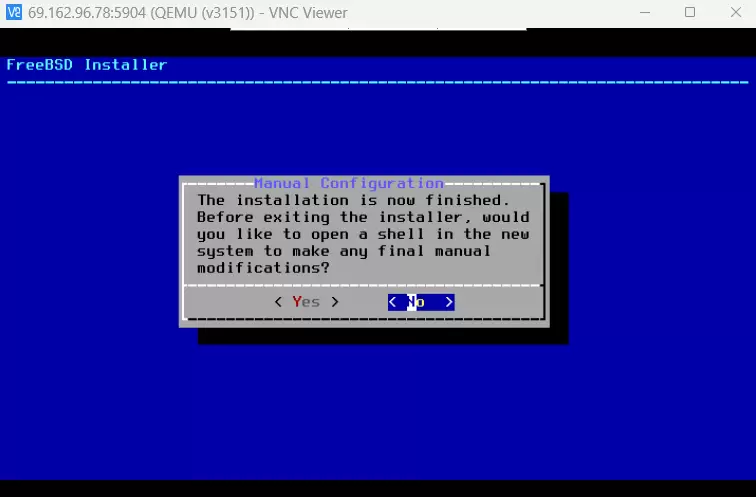
- Upon completion, optionally open a shell to make any manual configuration changes.

- Now, head back to the VPS manager interface and update the boot order that was previously modified in Step 6. Set the VPS to boot from the “DISK1” (move “DISK1” to the top position).
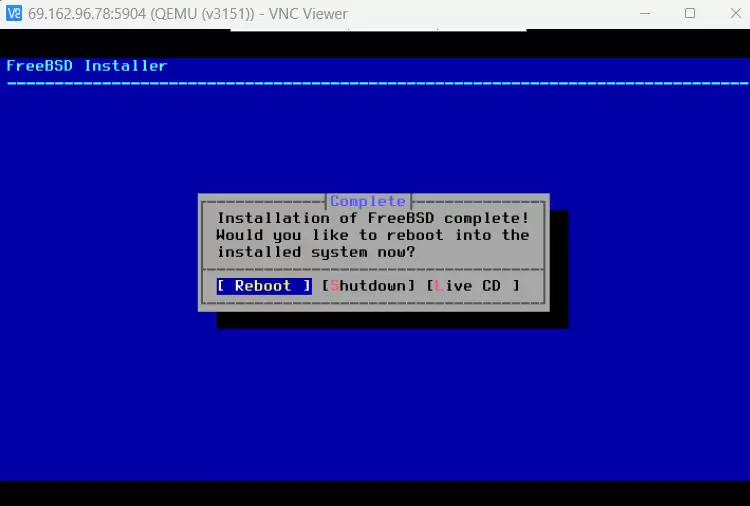
- After configuration, it’s now time to reboot the VPS.

- Once the server has completed the reboot, you can login to your FreeBSD 14 VPS server via SSH using the credentials set during previous steps to access the FreeBSD welcome screen.

- This concludes the guide. Congratulations on successful launch of your new FreeBSD 14 VPS server!
Conclusion
You now know how to launch a FreeBSD 14 VPS server using your Rad Web Hosting account!
If you’re in the market for Cloud VPS servers, consider trying us out! New users can save 50% with code “NEWHERE“.
Have a question about VPS services? Contact our support team or use the live chat on our website 24/7!





[…] FreeBSD 14 VPS: Ensure that FreeBSD 14 is installed and running on your […]